> ## Documentation Index
> Fetch the complete documentation index at: https://docs.fimo.ai/docs/llms.txt
> Use this file to discover all available pages before exploring further.
# CMS dashboard
> Manage your site's Singles and Collections in the Content tab, with auto-save for every edit.
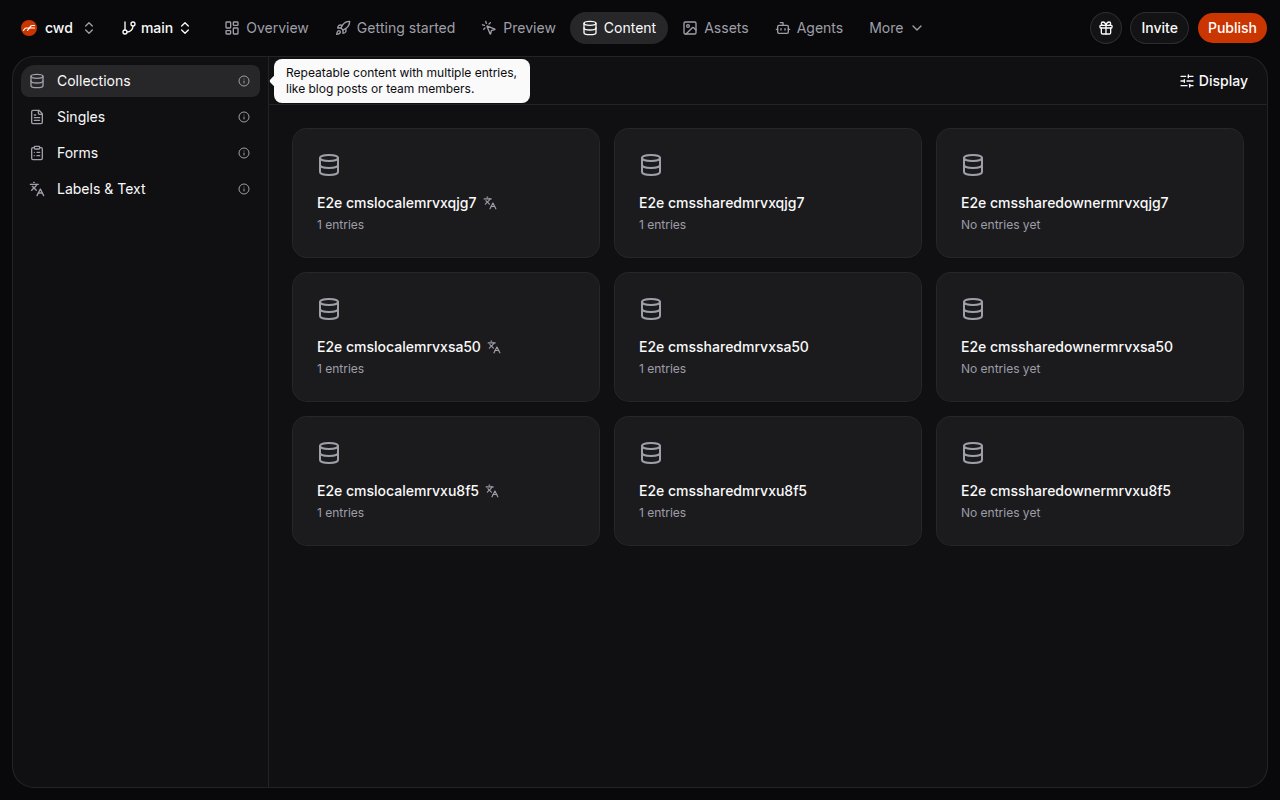
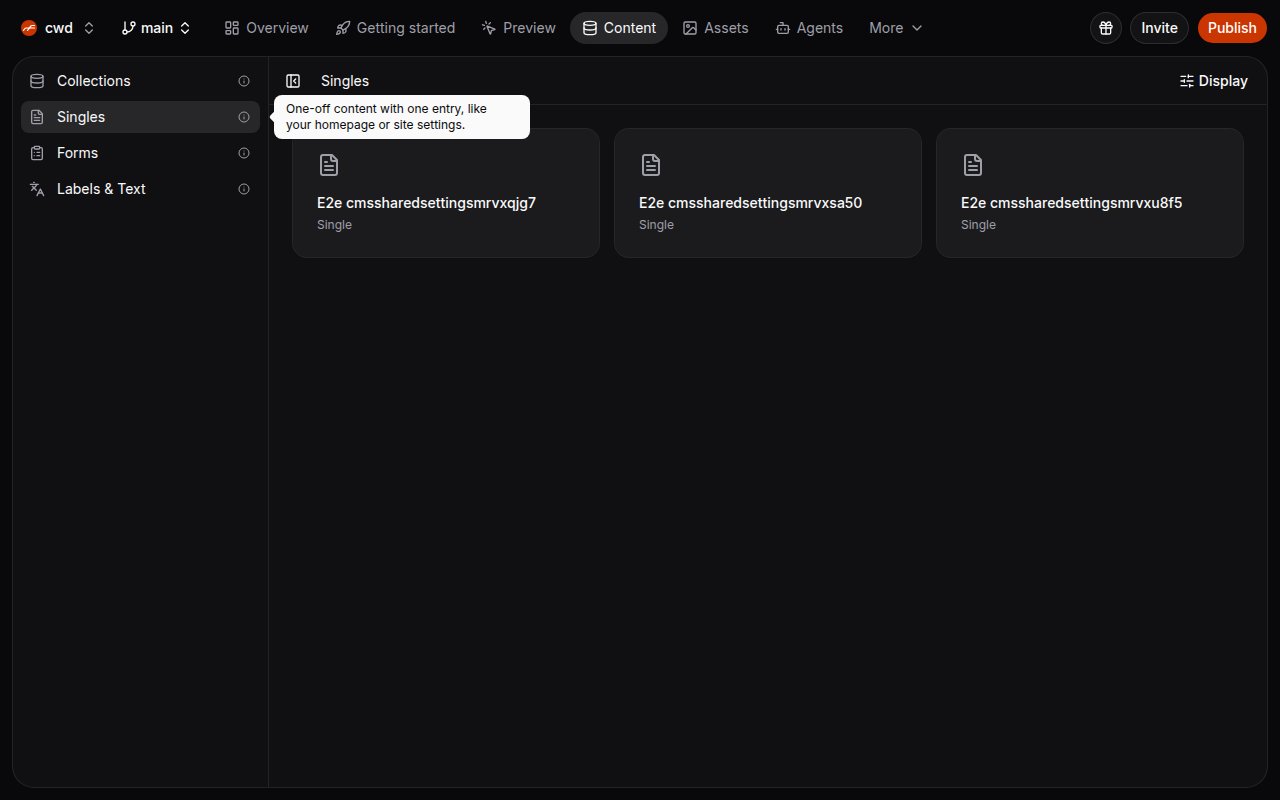
The CMS is where you manage your site's structured content. **Collections** hold repeatable entries, such as blog posts or team members. **Singles** hold one-off content, such as Site settings, a Homepage, or an About page.
## Browse your content
Click the **Content tab** (the database icon) in the top navigation bar.
The sidebar starts with **Collections** and **Singles**, followed by **Forms** and **Labels & Text**. Choose
Collections for repeatable content or Singles for one-off content. Hover or focus the information icon beside any
sidebar item for a short explanation.
Click a Collection card to see its entries, then open an entry for editing. Click a Single card to edit its one
document directly.
Collection cards show their entry count. Single cards are labeled **Single** because they always represent one document. Inside a Collection, a **search bar** filters entries by text, a **sort** dropdown orders them by supported fields, and a **columns** dropdown (the eye button) shows, hides, and reorders columns.
 ## Set the team's defaults
Fimo gives everyone in the project the same starting layout while keeping everyday changes lightweight:
* On **Collections**, open **Display** to reorder collection cards.
* Inside an entry, open **Display** to reorder the form fields.
* Inside a collection, use the sort dropdown to choose the starting entry order.
Reordering or sorting changes your current screen first. A dot on the control shows that your layout differs from the default. Open the same menu and choose **Save as team default** when the result should become the project's shared starting point. This action is available to teammates who can edit content.
The menu shows **Using Fimo default** or **Using team default** when your current layout matches its starting point. Choose **Reset changes** to discard an unsaved customization. Choose **Restore Fimo default** to remove the team's shared override. Collections and fields return to their automatic schema order, while entry sorting returns to newest first. In long menus, only the options scroll, so the current state and actions stay visible.
Shared defaults work across environments. If an environment does not contain a configured field or collection, Fimo
skips it without showing an error. New fields and collections appear automatically, and a missing sort field falls
back to newest entries first.
## Edit Singles
Open **Singles**, then choose the content you want to edit. Changes save automatically. Singles do not have an entry list, create action, bulk actions, or delete action because each one always represents the same document.
## Create and edit Collection entries
To add content, open the collection and click the **+** (plus) button at the top (labeled **New entry**) — or the **Create entry** button in the center if the collection is empty. Fill in the fields the collection defines: text, images, dates, and so on. Short text fields use one compact line. Longer plain-text fields start taller and grow as you write. Formatted content uses the rich-text editor.
There's no Save button — changes save automatically as you type (the top bar shows **Saving** / **Saved**). If the collection is wired to a page on your site, new content shows up there automatically.
On desktop, drag the entry editor's left edge to give the form more or less room. Fimo remembers your preferred width. Click outside the editor to close it safely after pending changes save. If a field is invalid or a save fails, the editor stays open so you can review the issue, retry, or discard only the unsaved changes.
To update or remove several entries at once, use the **checkboxes** next to entries to reveal the bulk actions bar, then choose **edit** or **delete** and confirm.
## Let the AI help
Ask the AI chat to manage content for you — for example, "Create a Testimonials collection with name, quote, and photo
fields," or "Add 5 sample blog posts about web design." Type **@** to reference specific content, and ask it to wire a
collection to a page so entries display automatically.
## What's next
Manage the images your entries use.
Create collections and entries by asking.
Push your content changes live.
## Set the team's defaults
Fimo gives everyone in the project the same starting layout while keeping everyday changes lightweight:
* On **Collections**, open **Display** to reorder collection cards.
* Inside an entry, open **Display** to reorder the form fields.
* Inside a collection, use the sort dropdown to choose the starting entry order.
Reordering or sorting changes your current screen first. A dot on the control shows that your layout differs from the default. Open the same menu and choose **Save as team default** when the result should become the project's shared starting point. This action is available to teammates who can edit content.
The menu shows **Using Fimo default** or **Using team default** when your current layout matches its starting point. Choose **Reset changes** to discard an unsaved customization. Choose **Restore Fimo default** to remove the team's shared override. Collections and fields return to their automatic schema order, while entry sorting returns to newest first. In long menus, only the options scroll, so the current state and actions stay visible.
Shared defaults work across environments. If an environment does not contain a configured field or collection, Fimo
skips it without showing an error. New fields and collections appear automatically, and a missing sort field falls
back to newest entries first.
## Edit Singles
Open **Singles**, then choose the content you want to edit. Changes save automatically. Singles do not have an entry list, create action, bulk actions, or delete action because each one always represents the same document.
## Create and edit Collection entries
To add content, open the collection and click the **+** (plus) button at the top (labeled **New entry**) — or the **Create entry** button in the center if the collection is empty. Fill in the fields the collection defines: text, images, dates, and so on. Short text fields use one compact line. Longer plain-text fields start taller and grow as you write. Formatted content uses the rich-text editor.
There's no Save button — changes save automatically as you type (the top bar shows **Saving** / **Saved**). If the collection is wired to a page on your site, new content shows up there automatically.
On desktop, drag the entry editor's left edge to give the form more or less room. Fimo remembers your preferred width. Click outside the editor to close it safely after pending changes save. If a field is invalid or a save fails, the editor stays open so you can review the issue, retry, or discard only the unsaved changes.
To update or remove several entries at once, use the **checkboxes** next to entries to reveal the bulk actions bar, then choose **edit** or **delete** and confirm.
## Let the AI help
Ask the AI chat to manage content for you — for example, "Create a Testimonials collection with name, quote, and photo
fields," or "Add 5 sample blog posts about web design." Type **@** to reference specific content, and ask it to wire a
collection to a page so entries display automatically.
## What's next
Manage the images your entries use.
Create collections and entries by asking.
Push your content changes live.